

An easy to follow guide highlighting the most common shooting positions for rifle shooters and when to use them.
When you are at the rifle range preparing for hunting season, what’s your process? If you’re like many hunters, you take a seat at the tables, send a few rounds down the range, adjust the scope a few clicks, and repeat. Then you leave.
You figure if the gun is sighted in and you can hit bullseye from the table, you’re ready for the season.
This can be a big mistake.
Sure, if you hunt from a comfortable deer stand or blind, then your shooting may be easy. But if you’re in the field, hiking through rough terrain and taking game as it comes, there won’t be a shooting table in sight.
To have the most success, you need to place accurate shots from one of the basic shooting positions…
Master the Basic Shooting Positions for Better Performance
Note: All Positions Discuss Right-Handed Shooter
To make this article as simple as possible, we will discuss all shooting positions from the perspective of a right-handed shooter. If you are left-handed simply reverse the position. If we say, for example, “place your left leg forward,” left-handed shooters will place their right leg forward.
Prone
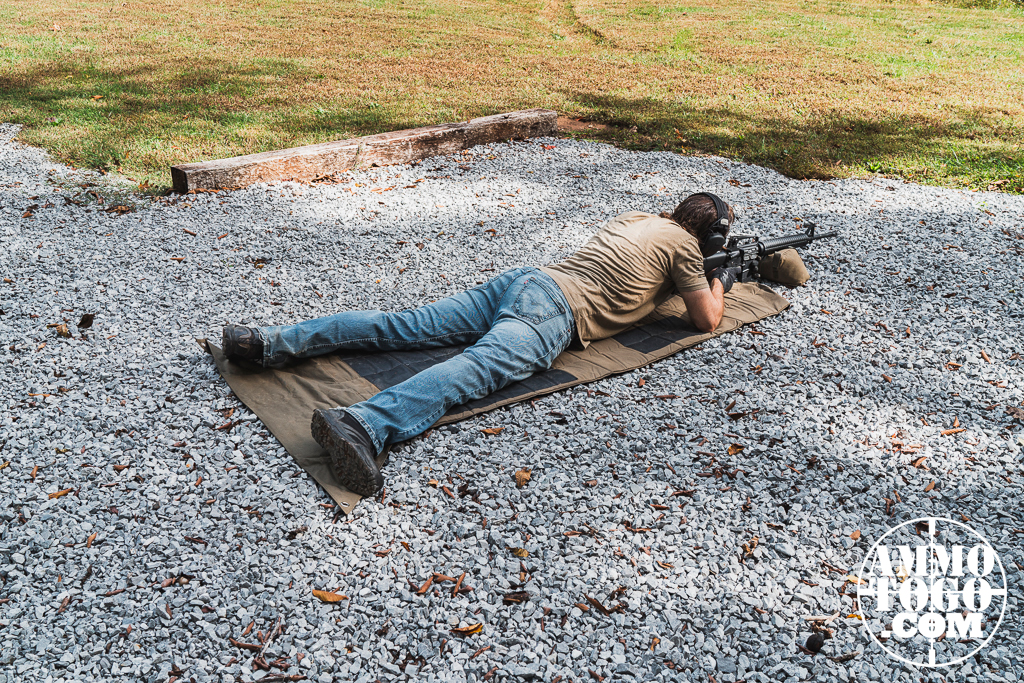
Of all the rifle-shooting positions, prone is the most consistent, stable, and accurate, but it’s not always the most practical. With prone, you are essentially laying behind the rifle with your belly down and both elbows firmly planted in the ground. Your body will be at a slight angle to the left, and some shooters prefer to have their left knee angled outward for greater stability.
To increase constancy in the prone position, you can use a bipod, which will give stability at the end of the rifle. You can also use your pack as a rest, but always be sure that you are resting the stock of the gun on the support, not the barrel. (This goes for all shooting positions.)
Prone is extremely stable, but terrain, vegetation, or timing could force you into higher positions. In general, the higher from the ground, the less accurate you will be, so start by practicing prone, then work your way up.
Seated Cross-Legged
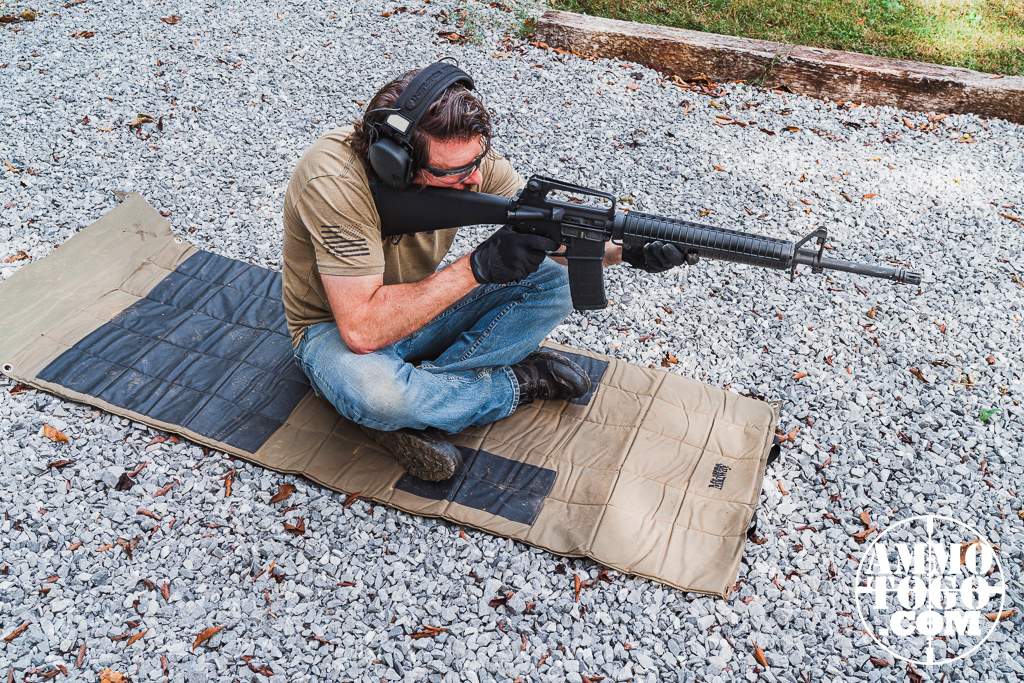
While prone is accurate, it’s also the least practical, and you may need to move up into the seated. You can usually work the seated position in one of two forms: cross-legged or cross ankle.
With seated cross-legged, you simply sit with your legs crossed and your knees angled slightly upward. Each elbow will rest in the grooves on the inside of your knees, not on the bony kneecaps, which provide less stability.
To use this positions effectively, you have to bend forward quite a ways, and it can be uncomfortable for people who are less flexible. Not only that, but it tends to force the barrel of the gun downwards, making proper shots more difficult. To address these shortfalls, some hunters prefer the seated cross-ankle instead.
Seated Cross-Ankle
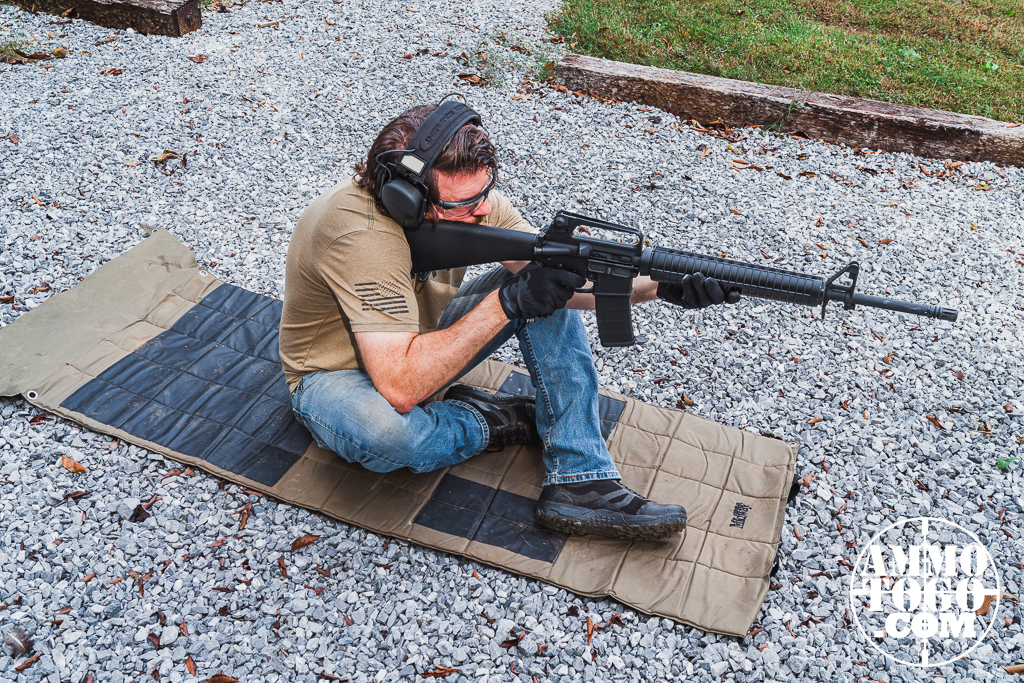
This position is very similar to cross-legged, but instead you have your feet out in front and cross at the ankles, keeping a slight bend in the knees. The left elbow will rest on the left leg, just below the kneecap. This position allows you to relax and lay into the rifle, providing more support.
Like the prone position, the seated is steady and accurate, giving you greater consistency in your shots. However, if you either don’t have time to get into the seated position, or need to be higher off the ground because of terrain, vegetation, or shot angle, either seated position may not work. In this case, you could move up into the kneeling position.
Kneeling
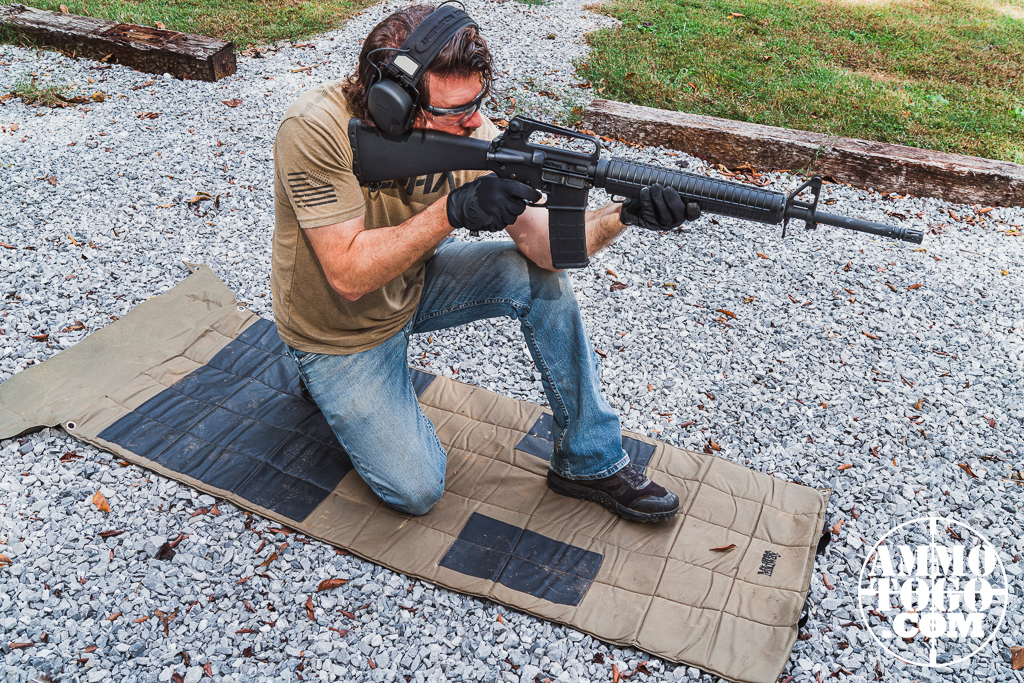
Although it’s not as steady as sitting or prone positions, with practice the kneeling position will give you a reliable base for your shot placement and could be the difference between harvesting a trophy and missing an opportunity.
With kneeling, you simply bend down with your left knee up and keep your right knee planted into the ground. Some shooters will lean backwards, sitting on their right foot, but it’s possible to lean all the way back, with your rump on the ground while keeping your left knee up.
The left arm will support the stock of the gun, with the left elbow planted on the knee. Many shooters prefer to have the right elbow extended horizontally, but you’ll want to practice with various angles, from closer to the ribs to fully extended, and see which works best for you.
With practice, you can use kneeling as a quick, reliable shooting position that allows you to take effective shots from virtually any spot in the field. However, if you need an even faster shot, you’ll want to practice the standing position.
Standing (aka Off Hand)
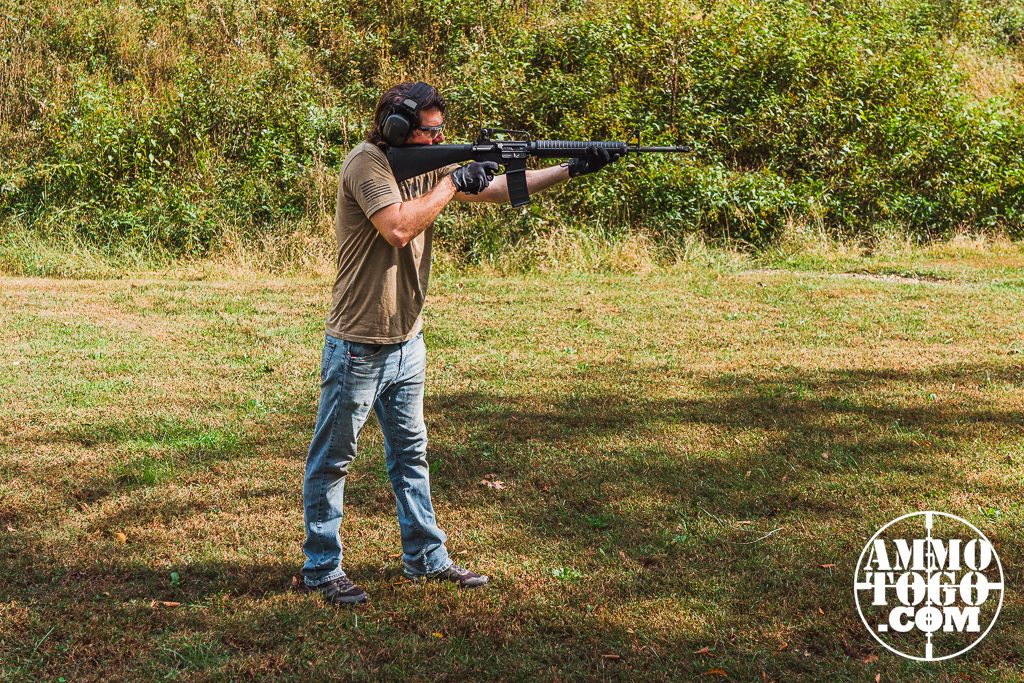
Standing position allows you to take accurate shots with less time than any other shooting position. However, this is the least steady of all the positions, so it’s not only demands practice, it is only recommended for closer shots.
With this position, you will extend your left leg forward with the right leg back and the right foot sitting roughly perpendicular to the rifle barrel. The left elbow can be extended outward, using shoulder and arm muscles to steady the barrel. The ideal form, however, has you will resting the elbow above your left hip, which you extend outward, giving you a slight backwards lean.
Because this position is the most difficult to master, you should spend a large portion of your range time in the standing stance. With time, you will have consistent shot placement that you can access at a moment’s notice, but always remember that standing position is a last option; if other positions are possible, use them.
Tips for Shooting Accurately in the Field
Use a Horizontal Branch
Using supportive structure whenever possible is a great way to increase shot accuracy. A horizontal branch is great for steadying the barrel, but always remember to rest the stock of the gun, not the barrel itself, on the branch.
Grab the branch right where the rifle is resting, and if the branch is strong enough, lean in slightly for firm stability of the gun.
Use the Side of the Tree
If a horizontal branch at the right height is not available (and they rarely are) you can use the side of the tree for support. Take your left hand and place it on the tree trunk at the desired height, and extend the top finger to create a resting place for the front of the rifle. This will provide better stability and allow you to stay hidden behind tree cover.
Sling Wrap
If you’re in the field, you likely have a sling on your rifle. This sling is not just for hiking comfort, it can also be used to increase stability and accuracy. When preparing to shoot, take your left arm and move it thought the space between the sling and the rifle with the sling high into your armpit. Then take your hand and wrap the sling around your wrist before moving your hand into position. This will give you a firm hold on the rifle and allow better shot placement. Also called the “handy sling,” this technique can be used with virtually any shooting position.
Reading about shooting positions is just the start! For the best results, you need to take a case of ammunition to the range and spend a couple hours practicing these positions. The more time you spend, the better you will be in the field. Practice with your rifle will not only make you a more successful hunter, it’s extremely satisfying when you begin to see improvements at each position.

