
If you shoot as much as we do, it’s inevitable that you’re going to need to change out your AR-15 barrel at some point. In this guide, we’ll go through the steps to swap out your old, worn barrel for a shiny, new and accurate replacement barrel.
There are several reasons why you might want to install a different barrel on your AR-15. You may want a different barrel twist-rate, a different barrel metal type, or to acquire accessories that your current barrel doesn’t have. Whatever the reason, changing out a barrel is something all AR15 owners should know how to do. This task may seem intimidating to do yourself at first, but following the instructions in this article and video, taking your time, and having confidence in your abilities will all help you to be successful. Uninstalling and installing an AR-15 barrel take several steps, though it does not actually take that much time to do. Specifically for this article, I installed a new barrel on my DPMS Oracle AR15, so some of the parts may be a little different than yours, but generally the steps are the same. Check out this video with step-by-step instructions to help you along if you prefer.
Getting Started
 To begin, you will need a sturdy and clean work table and the tools listed below.
- Vice, mounted to worktable
- Vice block
- Armorer’s wrench, with barrel nut tool, muzzle tool, and 1/2in fitting for 1/2in torque wrench
- 1/2in torque wrench
- Set of Allen wrenches
- Plastic punch
- Level
- Firearm grease
- Shop rags
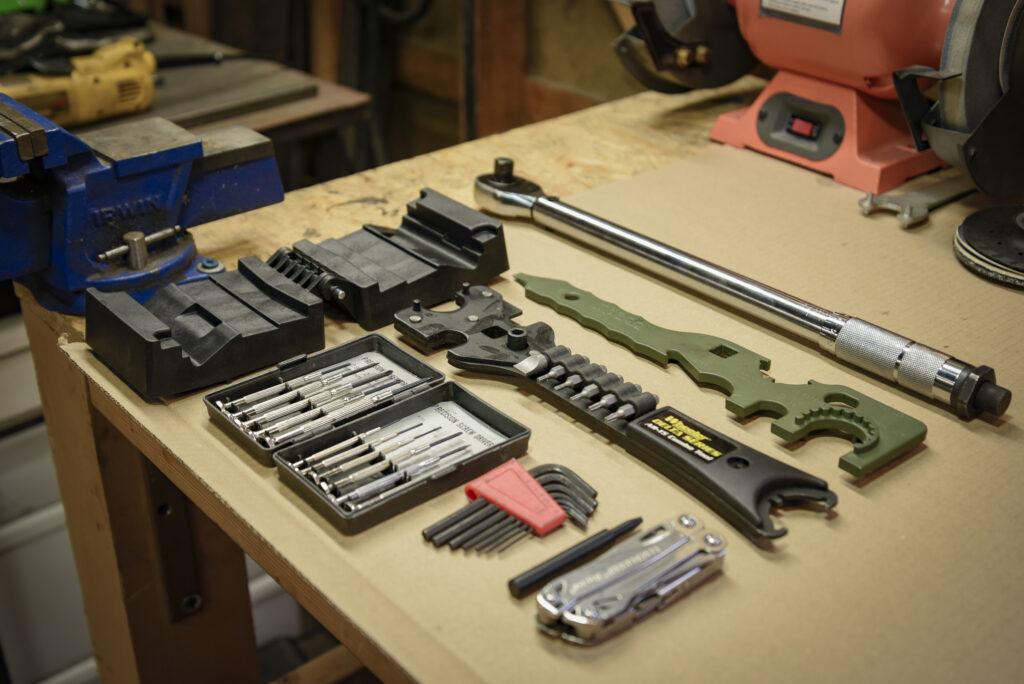 Some shooters have different methods for swapping barrels so you might be able to get by with fewer tools than what I’ve listed above. This vice block is custom built for AR15s and is designed to securely hold the upper and lower independently of one another in a vice. The vice block and armorer’s wrench can easily be found online or at most AR15 dealers. A torque wrench can be found at most any hardware or automotive store. This wrench has a learning curve, but is pretty easy to figure out how to use with accompanying instructions, or finding them on the web. A small amount of firearm grease is needed, though the type of grease is up to debate, as you will find varying recommendations out there. Shop rags are nice to have as well to keep parts, and your hand clean.
Steps to Uninstall an AR15 Barrel
Step One
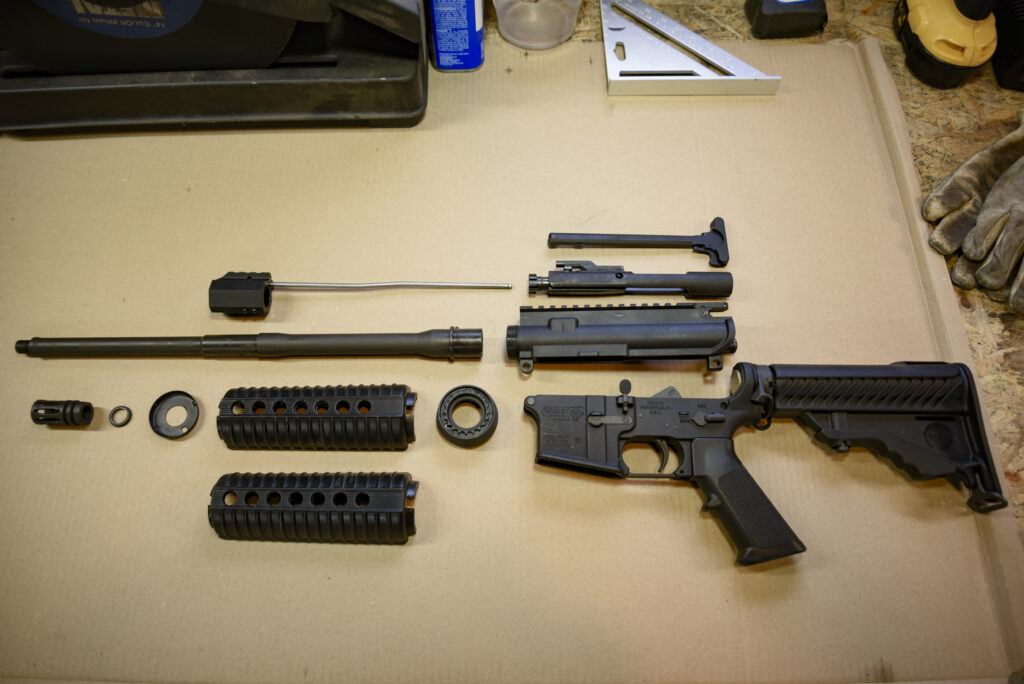
 Remove the upper receiver, which includes the barrel and handguard, from the lower receiver of the AR-15. This is an easy task, which requires removing two pins. After removing the upper you will want to remove the bolt, bolt carrier, and charging handle and components by sliding them out from the upper.
Step Two
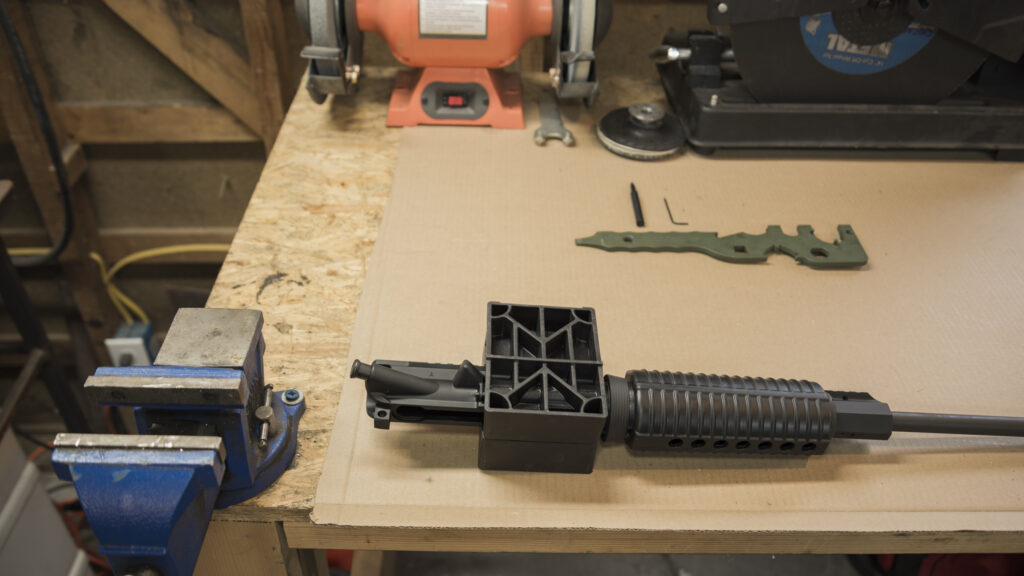 Place the upper into the vice block and then place the vice block securely into the vice, with the Allen screws on the gas block facing upwards.
Step Three
 Remove the handguard by pushing the delta ring towards the upper receiver. Then, pop off one side of the handguard, and then the other.
Step Four
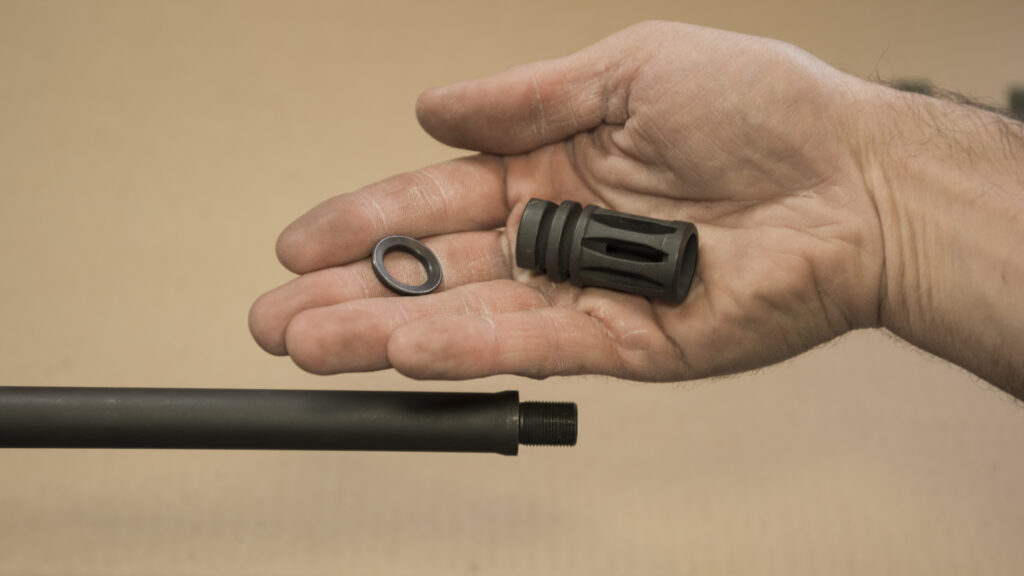 Remove the flash suppressor and peel washer using the muzzle tool on the armorer’s tool.
Step Five
 Remove Allen screws from the gas block.
Step Six
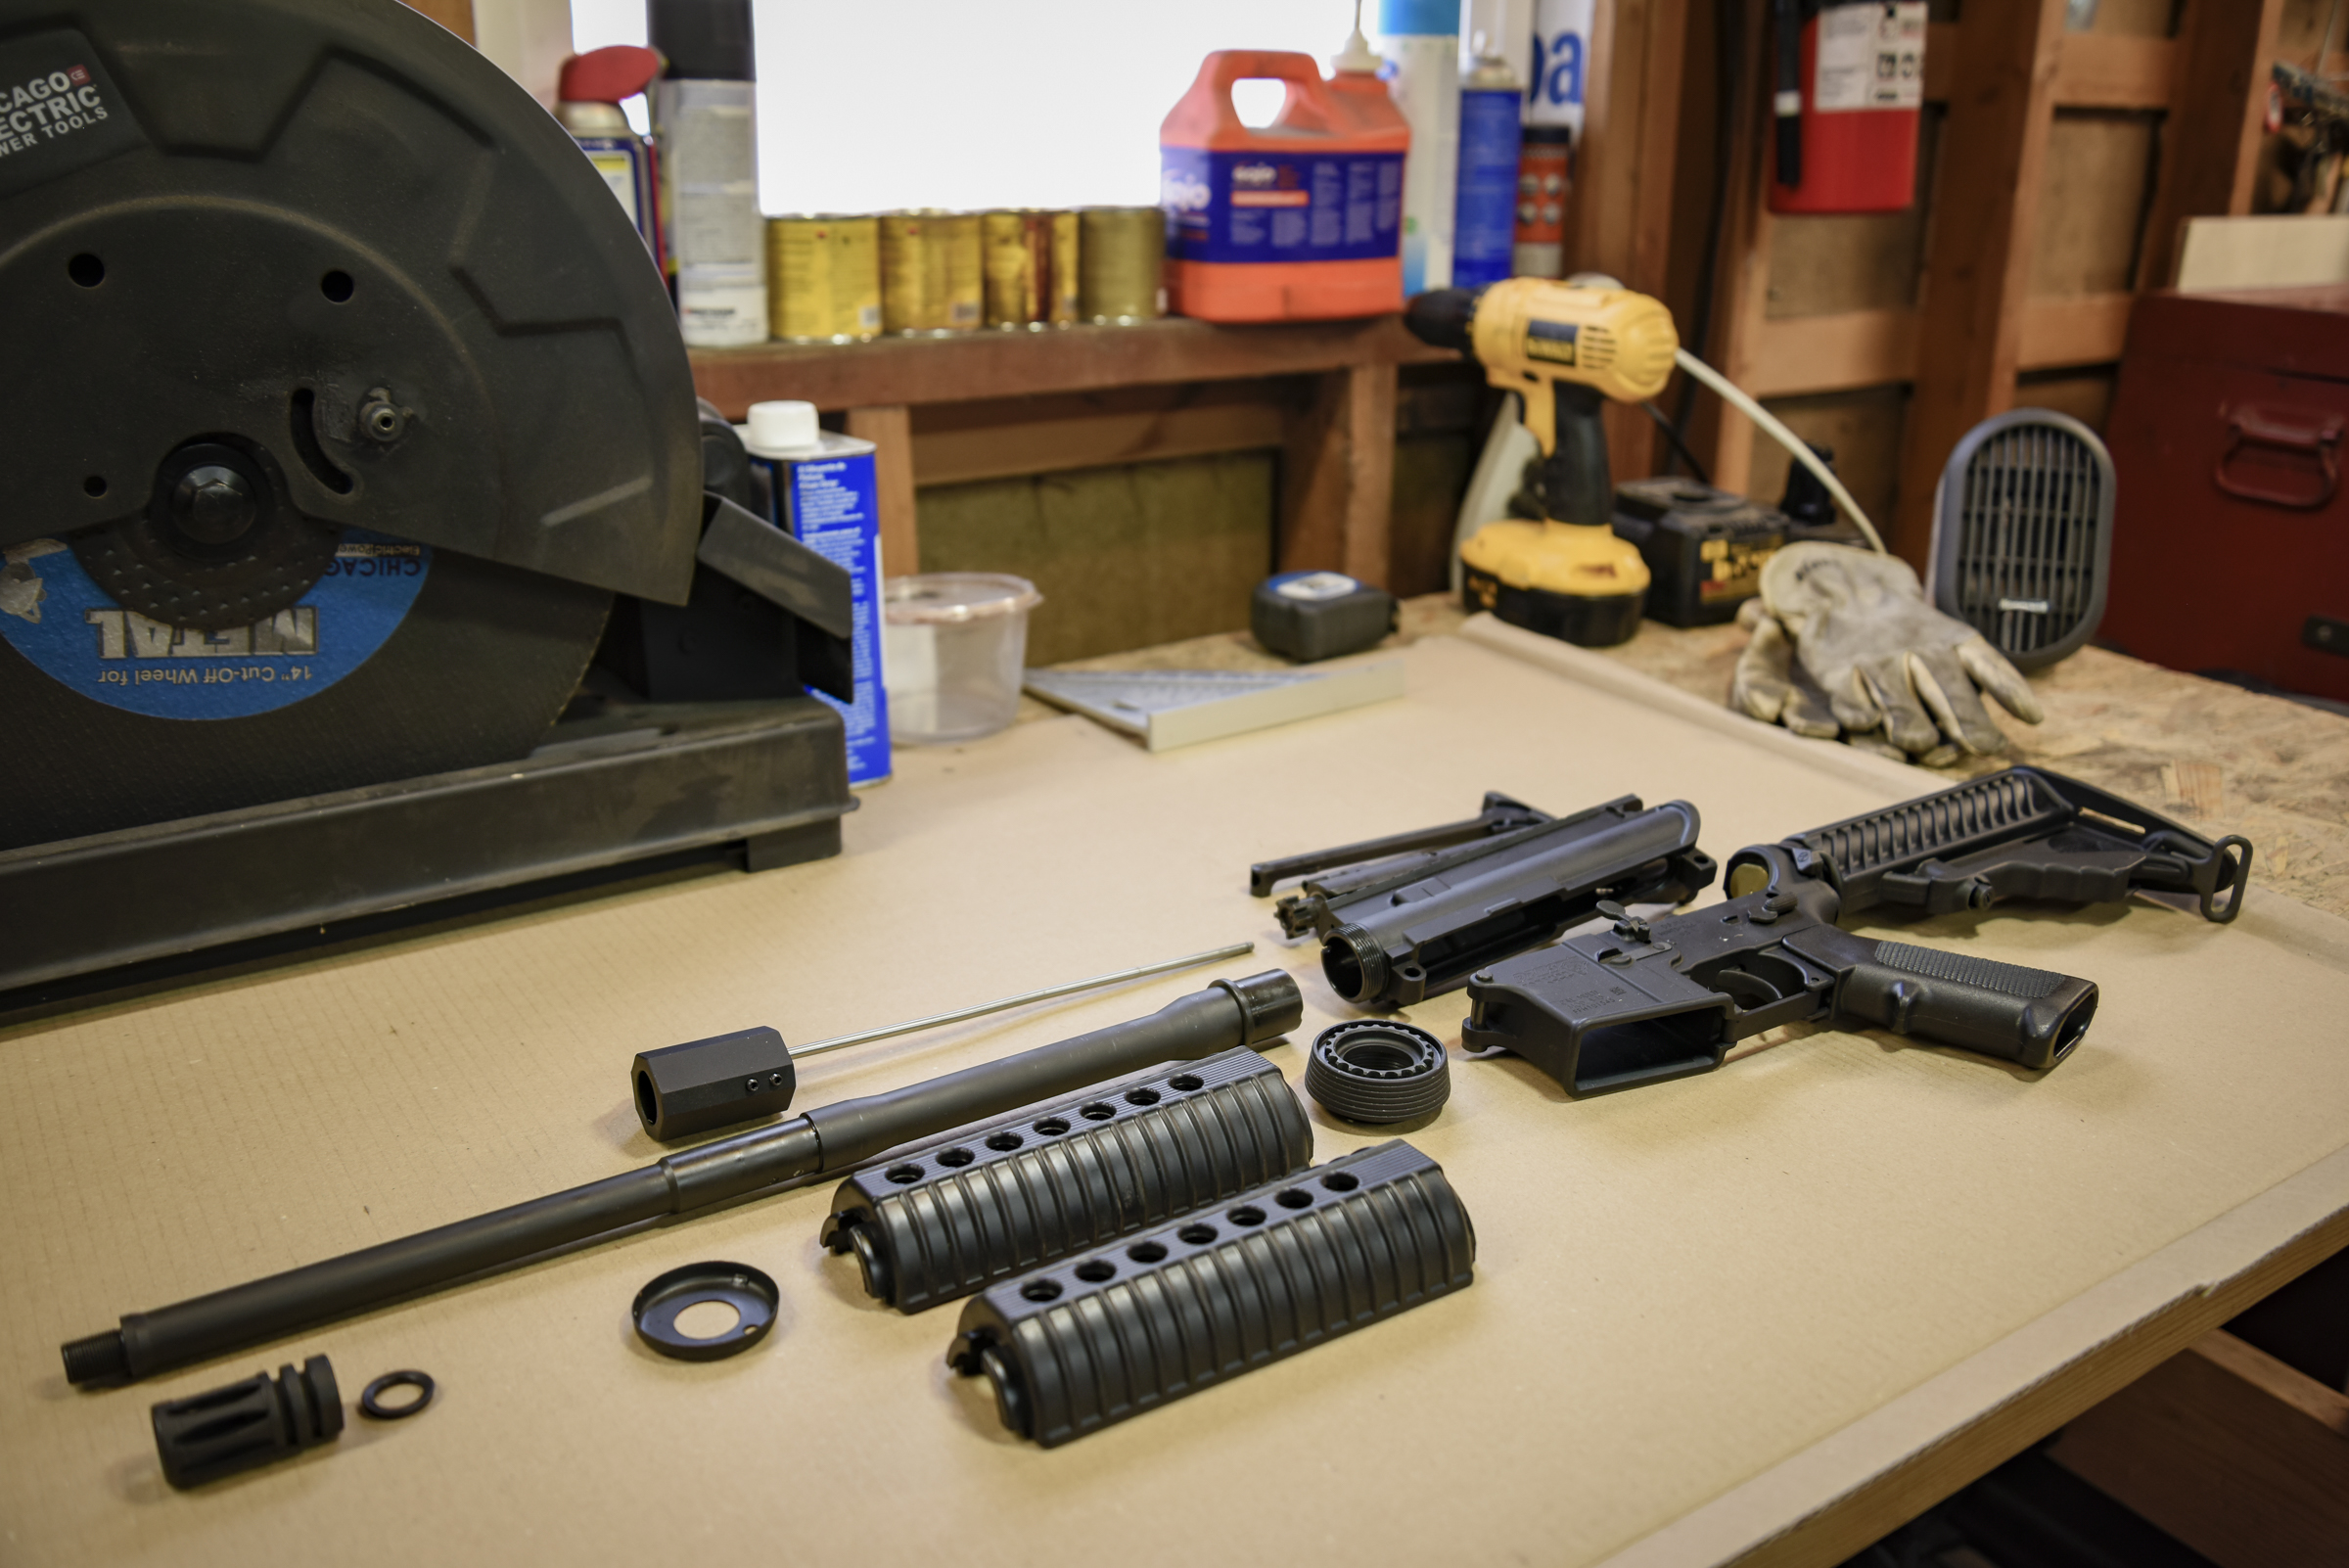
 Slide gas block, gas tube, and handguard cap off barrel and away from upper. The gas tube will come out of the gas tube hole in the upper as you do this.
Step Seven
 Use the barrel nut tool on the armorer’s tool to loosen the barrel nut attached to the delta ring assembly. Then remove the delta ring assembly by sliding off barrel and away from upper.
Step Eight
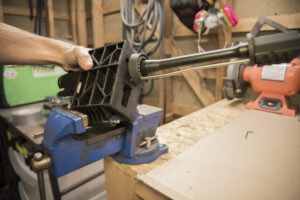
 Carefully slide barrel out of upper making sure not to scratch or damage the barrel extension and barrel-indexing pin.
Installing a New AR-15 Barrel
Step One

Lightly grease the barrel extension and slide into upper, making sure the barrel indexing pin fits into the barrel-indexing slot. 
Step Two
 Slide the delta ring assembly over the barrel towards the upper and tighten by hand.
Step Three
 Using the punch and Allen wrench, pre-index the hand guard snap-ring, weld spring, and barrel nut components of the delta ring assembly, by moving their gas tube holes inline with one another.
Step Four
 Use the torque wrench to tighten the delta ring assembly on the upper. This wrench is used, so as to not damage or break the upper delta ring threads by applying too much force. Starting at 30 foot pounds, work your way up in increments of 10 foot-pounds, until the barrel nut is indexed inline with the gas tube hole on the upper, going no more than 80lbs.
Step Five
 Index the hand guard snap ring, weld spring, and barrel nut components of the delta ring assembly, by moving their gas tube holes inline with one another.
Step Six
 Slide the gas block, gas tube, and handguard cap onto barrel and towards upper. Slide the gas tube through the delta ring assembly’s indexed gas tubes holes, and into the gas tube hole in the upper as you do this.
Step Seven
 If the new barrel does not have Allen screws indexing marks for the gas block, you will need to level the gas block on the barrel to match the leveling of the upper in the vice.
Step Eight
After positioning and leveling the gas block, tighten the Allen screws to mount the gas block.
Step Nine
Install the handguard by pushing the delta ring towards the upper receiver. Then pop on one side of the handguard, and then the other.
Step Ten
 Install the flash suppressor and peel washer using the muzzle tool on the armorer’s tool.
Congrats – It’s Range Time
 You’re done! You’ve successfully installed and uninstalled an AR15 barrel. With this new skill, you will now be able to change out your AR-15 barrel for a different barrel “twist rate”, a different barrel metal type, or to buy AR-15 accessories that your current barrel doesn’t have. Remember, this task does not take a long time, but it does require taking your time, and having confidence in your abilities to be successful. Putting in the time to make sure you perfect the install can save you a lot of headaches at the range — or worse. Of course, we have to suggest if you’re not comfortable installing a barrel yourself, don’t be afraid to consult with a trained gunsmith to ensure your next training trip is as safe as it can be.