
A guide to the incredibly popular Dot Torture Drill. This guide takes you through the steps to do the drill, what it’ll help improve and even where to get free targets for your next torturous trip to the range!
On the surface, the Dot Torture Drill seems pretty straightforward. It looks like a simple 50-round defensive shooting drill. However, this drill manages to incorporate almost every skill you’ll need for self-defense shooting. It has strong side shooting, weak side shooting, reloads, holster draws, and more. It even has target transitions (although those targets are admittedly pretty close together).
This accuracy-centric drill requires intense focus, impeccable sight alignment, and flawless trigger control. If you want an authentic assessment of your performance on the fundamentals, this drill will shine light on all the dark flaws in your technique.
Critics of the Dot Torture Drill claim it does little to build real world shooting skills. While this drill isn’t really a skill builder, it does make a fabulous benchmark for measuring both growth and atrophy. Let’s take a closer look at this intense shooting drill.
Shooting at Dots
Dot Torture differs from most defensive shooting drills, because it doesn’t involve silhouettes or life-size vital zones. Instead, you get to shoot at a series of two-inch dots. However, dot shooting isn’t new or unique. The iconic bullseye has been around longer than modern firearms.
While that iconic bullseye has been mostly supplanted by targets that at least vaguely resemble human bodies, dot targets are perfect for detail work. It’s almost impossible to cheat small targets, and they are thoroughly unforgiving of even the smallest errors in form. If you want to improve your marksmanship, ditch the silhouette and shoot some bulls eyes. 
Who Invented the Torture?
Dot Torture is a specific drill created by David Blinder of Personal-Defense-Training.com. I haven’t met David, but I have run his drill. I imagine he is probably the sadistic sort who enjoys kicking puppies in his spare time.
They don’t call this “Dot Torture” for nothing. This drill is bullseye shooting on steroids. If you want a heaping dose of humility (maybe even humiliation), this is the drill for the job.
Dot Torture Drill
What it works:
- Focus
- Trigger Control
- Sight Picture and Alignment
- Mental discipline
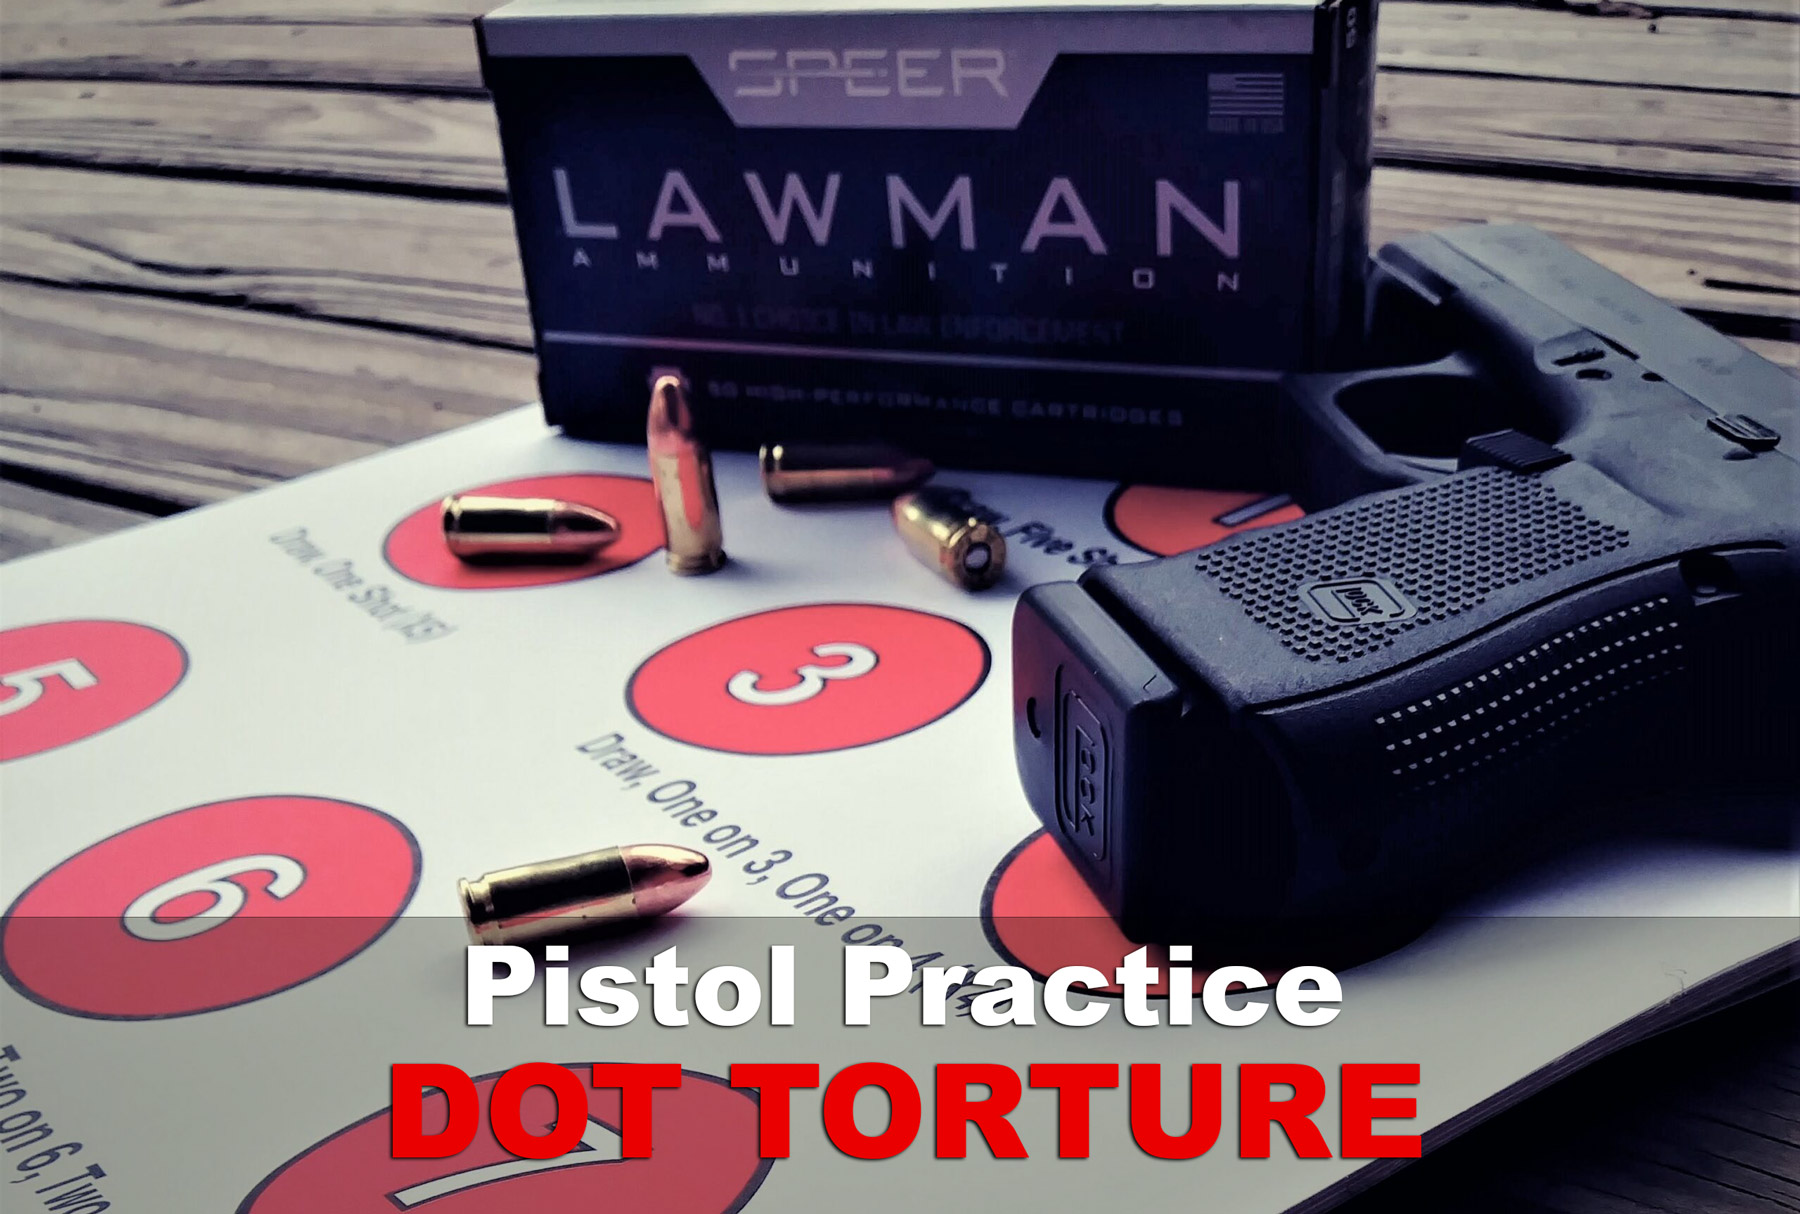
Dot Torture Targets
Get your dot torture targets here from the good folks at Pistol-Training.com. They are free to download and you can print them off to take the range with you. The target consists of ten 2-inch circles.
How To Do The Dot Torture Drill
Each circle has its own shooting goal. Here is a rundown of what each dot requires.

Dot 1: Draw and fire one five-shot group.
Dot 2: Draw and fire one shot, repeat for a total of five rounds.
Dots 3 & 4: Draw and fire one shot each on circle #3 and circle #4. Re-holster your sidearm. Repeat for a total of eight rounds
Dot 5: Draw and fire five rounds using only your strong hand.
Dots 6 & 7: Draw and fire two shots on circle #6, then two shots on circle #7. Repeat for a total of 16 rounds.
Dot 8: Fire five shots using only your weak hand.
Dots 9 & 10: Draw and fire one shot to circle #9. Reload and fire one shot to circle #10. Repeat three times for a total of 6 rounds.
You will start the drill with a holstered sidearm with the target positioned three yards from the firing line.
The instructions for each circle can be difficult to read from the firing line, so you may want an extra target to keep next to you for easy reference.
The goal of Dot Torture is maximum accuracy. This isn’t a timed drill, so there’s no need to rush your shots.
Making the Most of Each Dot
There are few things more humbling than the Dot Torture Drill. It can leave even the most level-headed shooter throwing mags and cursing her Grandma (Sorry, Granny.).
If Dot Torture has you beyond frustrated, here are some tips to help you do better on each dot.
Dot #1
Consider this your warm-up. Go ahead and relax because it only gets harder from here. Focus on your front sight post and a smooth trigger pull.
Dot #2
Although accuracy is still the goal, Dot #2 is the perfect opportunity to focus on a smooth draw/press-out.
Dots #3 and #4
This sequence builds on what you accomplished on Dot #1 and Dot #2. Don’t get panicky about that target transition. It’s only a couple of inches.
Don’t rush the second shot. Take your time and make sure you get a good sight picture before you squeeze the trigger.
Dot #5
I’m not going to lie. This is where I usually start to question why I ever picked up a pistol in the first place. This dot is going to be hard to shoot clean unless you’ve incorporated strong-hand only techniques into your regular practice. If you haven’t, go ahead and start now. I promise you’ll thank me.
Dots #6 and #7
Don’t rush the second shot on each dot. You want to fully recover from the recoil of the first shot before you squeeze off shot number 2. With some practice, you should easily fall into a pew-pew-pause-pew-pew shot rhythm.
Dot #8

This dot right here is where this torture drill earns its name. If you can keep your cool and shoot this one clean (without dropping curse words like a sailor) you’re doing something special. Weak hand shooting will magnify every minuscule flaw in your grip, trigger press, and sight picture by at least tenfold.
My advice? Practice shooting with your weak hand long before you make it to Dot #8. If you’ve never shot with just your support hand, you’re in for a rude wake up call.
Also, apologize to your range buddies in advance for all the vulgarities that will inevitably spew from your lips.
Dots #9 and #10
First word of advice: Forget Dot #8. It’s already in the past, and it’s time to move on.
The reload on Dots #9 and #10 can cause a major break in concentration for some shooters. If you can, maintain focus on your target. If you have to briefly shift your attention during the reload, make sure you shift it back before you pull the trigger.
Stay focused on the target. Don’t let your mind wander. (Especially don’t let it wander back to the fiasco that was Dot #8.)
Making Dot Torture More Torturous

If this drill seems too easy (What kind of shooting savant are you?), you can increase the difficulty by moving the target back incrementally. If 3 yards isn’t enough of a challenge, try it at 5 yards. When you master the target at five yards, move it back to 7.
However, the ultimate goal is a clean run. Stay at a distance until you can consistently shoot it clean, then back it up.
Note: There is absolutely no shame in doing this drill at three yards. (At least, that’s what I keep telling myself.)
You can also add a time goal for some added pressure. Five minutes is the suggested goal time to complete the drill with zero misses. (Good luck!)
Final Thoughts
We admit Dot Torture is a pretty round-heavy drill. You’re going to need a full box of fifty to complete a single drill. However, if you have a spare box of ammo and a desire to put your shooting skills through the wringer, this drill tests every single shooting fundamental.
Dot Torture is a great way to shake up a boring training regimen. Just be prepared for a heaping dose of humility. This is one of the toughest modern shooting drills around.
If you’re up for a serious challenge, download a target and give it a try. Let us know what you think in the comments.